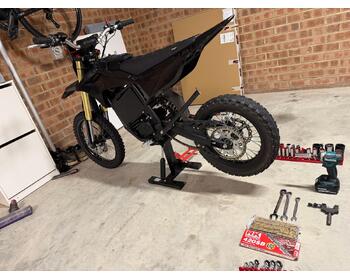
# ECR3000 / ECR Series Chain Replacement Guide
### Professional Step-by-Step Procedure
*(Suitable for the Crossfire ECR3000 and similar electric dirt bikes using a 420 chain (RK 420SB). Most procedures also apply to other motorcycles using clip-type master links.)*
---
# Safety First
⚠ **Before starting:**
* Switch the bike OFF.
* Remove the key.
* Disconnect the battery if practical.
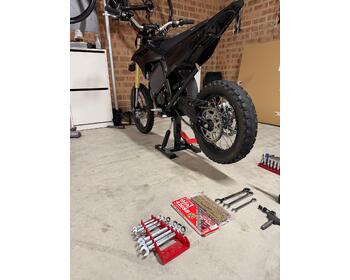
* Raise the rear wheel using a suitable bike stand.
* Wear safety glasses.
* Wear gloves when using the chain breaker.
* Never place fingers between the chain and sprockets.
* Never ride until the master link has been fully inspected.
* After installation, ride slowly for 5–10 minutes before rechecking chain tension.
---
# Tools Required
* Metric spanner/socket set
* Allen keys (if required)
* Chain breaker / chain press
* Long nose pliers
* Flat screwdriver (optional)
* Torque wrench
* Vernier caliper (optional)
* Chain lubricant
* Cleaning rag
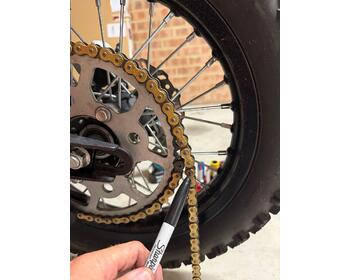
* Marker pen (helpful)
* Safety glasses
---
# Parts Required
* Correct replacement chain
* Matching 420 master link
* Replacement sprockets (recommended if worn)
---
# Before Removing the Old Chain
Inspect:
✔ Front sprocket
✔ Rear sprocket
✔ Chain guide
✔ Swingarm slider
✔ Wheel bearings
✔ Rear axle
If the sprocket teeth are hooked, sharp or unevenly worn, replace both sprockets together with the chain. Installing a new chain onto worn sprockets dramatically shortens chain life. ([yam-r125.net][1])
---
# Step 1 – Locate the Master Link
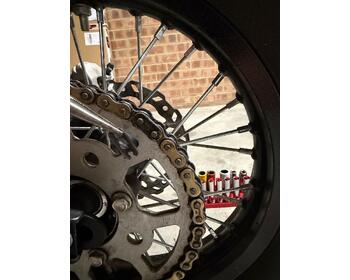
Rotate the rear wheel until the master link is easy to access.
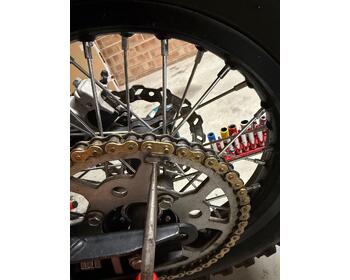
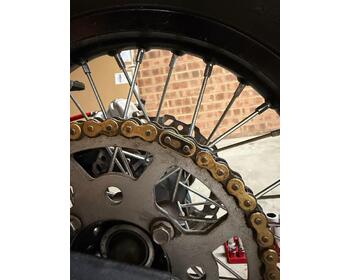
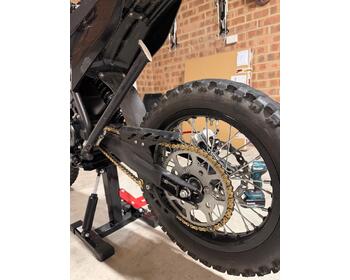
On your ECR3000 it is the gold-coloured joining link shown in your photos.
---
# Step 2 – Remove the Master Link Clip
Using long nose pliers:
1. Push the outer plate slightly inward.
2. Slide the clip off.
3. Remove:
* clip
* outer plate
* master link
4. Pull the chain apart.
If the chain does not have a clip link, use a chain breaker.
---
# Step 3 – Count the Links
This is one of the most important steps.
Before cutting the new chain:
Lay the old and new chains side by side.
Start counting from the master link.
Count every complete link.
Example:
```
Master Link
1
2
3
4
5
...
116
117
118
```
**Do NOT guess.**
The easiest method is simply to make the new chain exactly the same length as the old one.
Use a marker pen every 10 links if needed.
---
# Step 4 – Shorten the New Chain
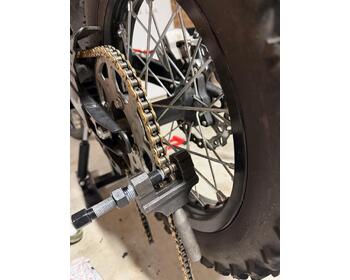
Using a chain breaker:
Position the pin over the chain rivet.
Slowly wind the tool until the pin is pushed completely through.
Remove unwanted links.
Never hammer the chain apart.
Your photos show the correct use of the chain breaker.
---
# Step 5 – Feed the New Chain
Route the chain exactly as the old chain.
Check that it:
* sits correctly over the front sprocket
* passes through the chain guide
* runs over the swingarm protector
* sits correctly on the rear sprocket
---
# Step 6 – Install the Master Link
Insert:
Master link
↓
Inner side plate
↓
Chain
↓
Outer side plate
↓
Retaining clip
---
# IMPORTANT – Master Link Direction
This is one of the biggest mistakes people make.
The **closed end** of the clip must face the direction the chain travels.
On the **top run of the chain** (from front sprocket to rear sprocket):
```
Bike moving →
Closed End →
[====]
Open End ←
```
Or remember:
> **Closed end goes first.**
This prevents the clip from catching and being pushed off while riding. ([MXstore Help][2])
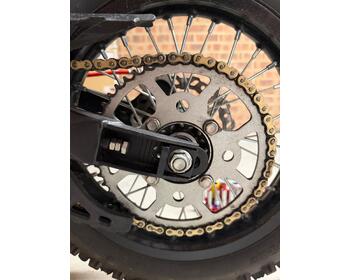
Your last photos show the correct orientation.
---
# Step 7 – Ensure the Plate is Fully Seated
Before fitting the clip:
The outer plate must be pressed fully onto the master link.
You should clearly see the grooves in both pins.
If required, use:
* chain press
* vice
* adjustable pliers
Never force the clip onto a partially installed plate.
---
# Step 8 – Install the Clip
Using long nose pliers:
Push the clip fully into both grooves.
Double-check:
✔ Clip fully seated
✔ Cannot rotate off
✔ Groove fully visible
---
# Step 9 – Adjust Chain Slack
Loosen:
* rear axle
* chain adjusters
Adjust equally on both sides.
Use the swingarm alignment marks as a guide, but verify that both sides are adjusted equally so the wheel remains aligned. ([ProCycle][3])
Rotate the wheel several times.
Check slack at the tightest point.
Adjust to the specification in your owner's manual (many off-road motorcycles are around **35–50 mm**, but always use the specification for your model). ([youtube.com][4])
---
# Step 10 – Tighten Rear Axle
Hold the axle.
Torque to manufacturer specification.
Re-tighten chain adjuster lock nuts.
Recheck slack.
---
# Step 11 – Lubricate the Chain
Spray lubricant onto:
✔ Rollers
✔ Side plates
✔ O-rings (if fitted)
Rotate the wheel several revolutions.
Wipe off excess.
---
# Final Inspection Checklist
✅ Master link fully seated
✅ Clip installed in correct direction
✅ Chain routed correctly
✅ Correct slack
✅ Rear wheel aligned
✅ Rear axle tightened
✅ Adjusters tightened
✅ Chain lubricated
✅ Wheel spins freely
✅ No tight spots
---
# Common Mistakes to Avoid
❌ Cutting the chain before counting links
❌ Installing the master link backwards
❌ Clip not fully seated
❌ Outer plate not pressed on far enough
❌ Unequal chain adjusters causing wheel misalignment
❌ Chain adjusted too tight
❌ Forgetting to lubricate the chain
❌ Reusing a damaged master link